


To assemble your skeletons, you'll need some superglue. We recommend Thick Super Glue, because it not only holds nicely, it fills those small gaps between pieces. You'll also need a file to smooth any rough spots, and something to cut the pieces off their sprues. Small diagonal cutter pliers are best, but a pair of nail clippers also work well.
There are four pieces to a skeleton: torso, skull, and two arms. All the pieces are fairly easy to identify, but their orientation may not be.

The torso is a chest and a pair of legs on a base. The front is the side that has the cavity on the lower torso. The back has a small slot on top -- the neck of the skull fits there.
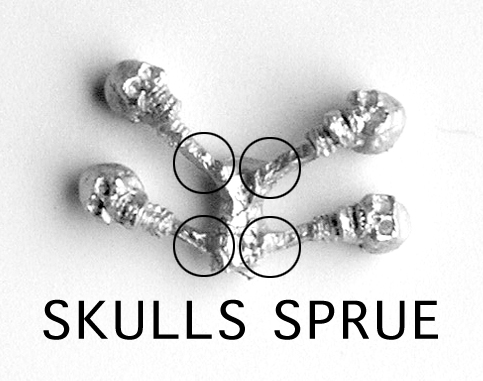
The head sprue is very obvious -- it's the one with four skulls attached.
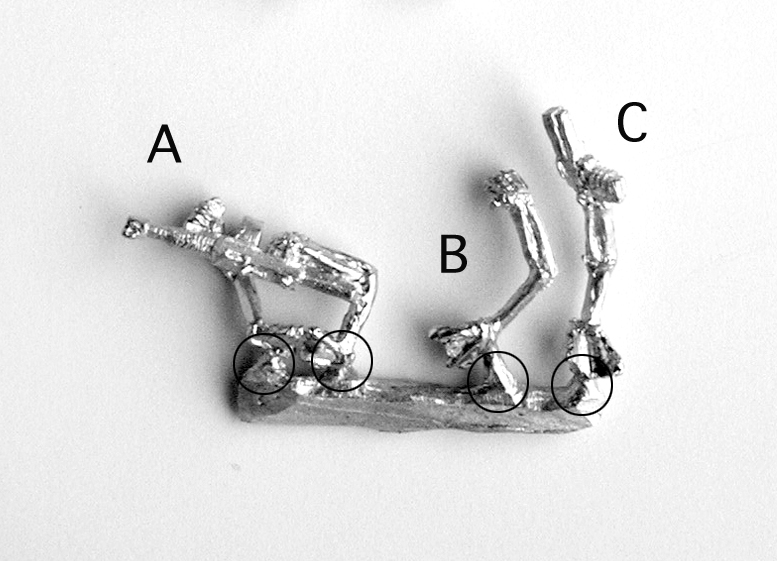
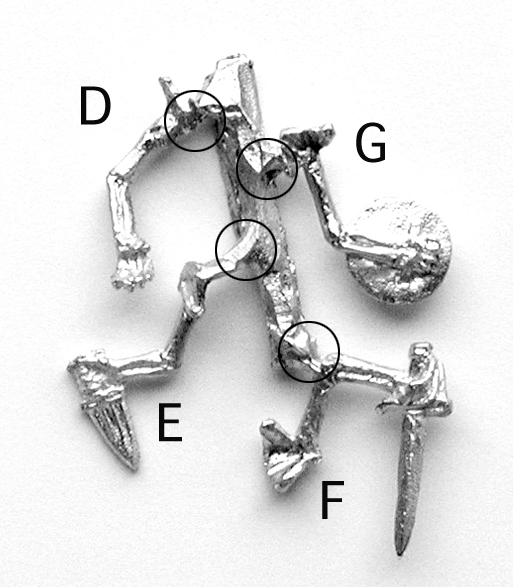
The arms sprues come in two varieties: guns and blades. There are seven unique pieces on the two sprues.
Putting a skeleton together is a fairly simple process. First, remove the pieces from the sprues. Attach the arms, then the skull. Prime and paint, or simply blackwash the figures for a simple effect.
Note that any of the skulls will fit on any of the torsos. The arms will fit on any torso, but must be placed on the appropriate side (i.e. right arms will only fit on the right side).
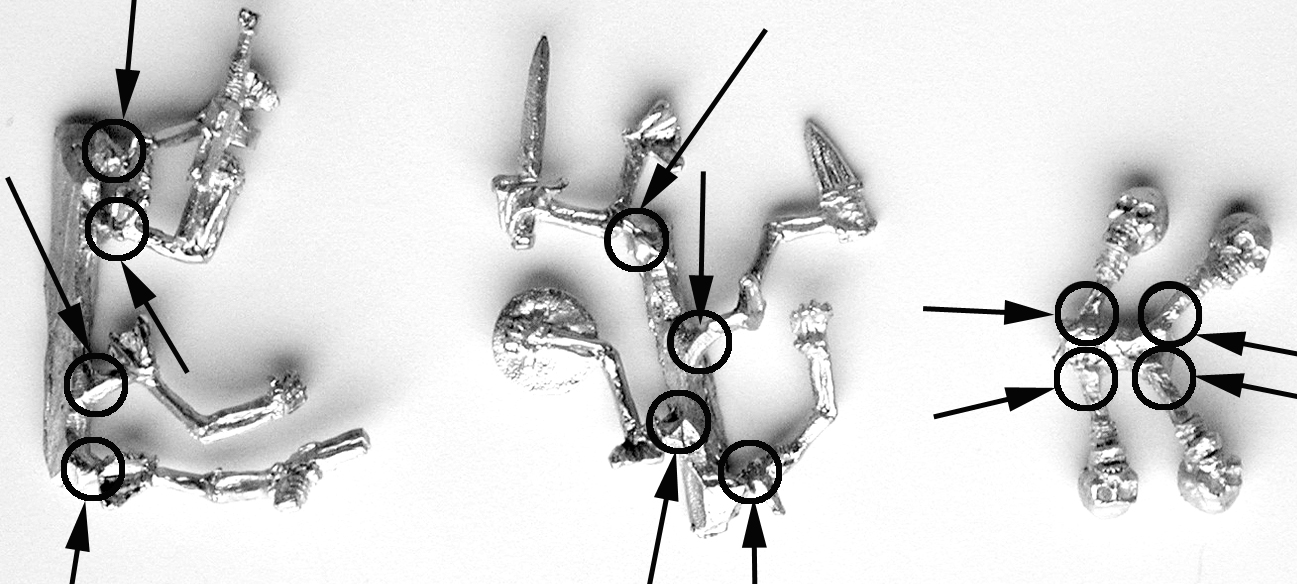
Use the cutters or clippers to cut the arms and heads from the main sprues. Leave the sprue long, especially on the necks, then trim later after fitting the piece to the torso. If a small amount of the sprue remains on the piece, use a file to smooth it off.
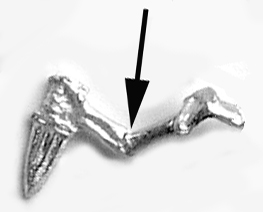
The arms (with one exception) join with the sprue at a flat plane on the shoulder blade, making it easy to remove any leftovers. The exception is the sword wielding right arm (F on the image above). The sprue for this arm joins just above the elbow. While this area is more rounded than the others, it is still fairly flat.
The first step in attaching the arms is to orient them to the front of the torso. Use the machine gun arms (labeled A above) as a guide -- the gun goes in front of the torso, which helps to orient the shoulder blades on the collarbone guides. Another detail to watch is the elbows, which should point towards the ground. The weapons should also be facing forward. Specifically, the pistol should be facing forward, the machine gun to the left, the dagger downward, and the swords upward.
If you wish to bend the arms into a new position, we recommend you do this now, before gluing them to the torso. The metal is fairly flexible, but be aware that it can break, especially under the stress of repeated or extreme bending. Also be aware of where the bend is taking place. Normal arms naturally bend at the elbow, but metal arms can bend at any point along their length. Two pairs of padded pliers, one on the upper arm and one on the lower, will provide a precise bend, but your fingers will work nearly as well.
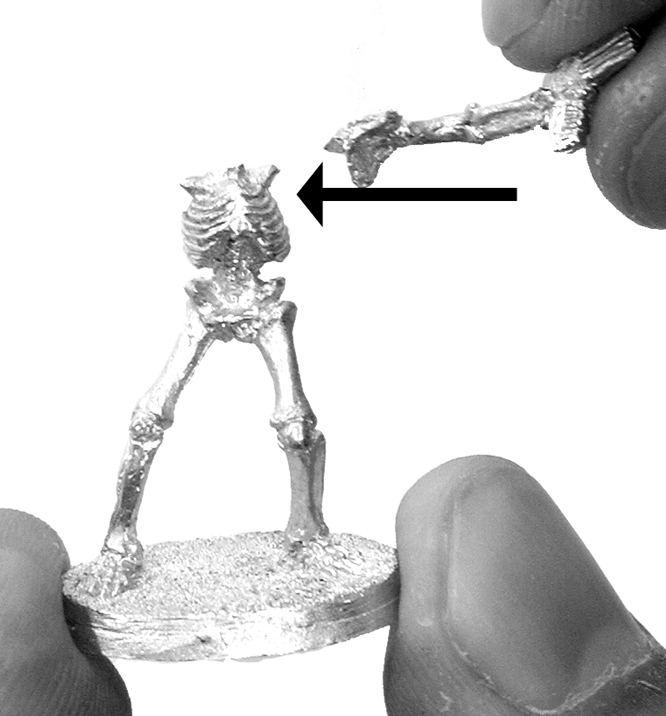
The connection joint between the arm and the torso is the shoulder blade. The fit will be loose, to allow the maximum range of poses. Always position the arms before applying glue.
As you choose a position for the arms, be aware of the slot on the back of the torso. If you attach the shoulder blades over the slot, it will be very difficult to attach the skull.
When you have chosen the arms and torso, and adjusted them to your liking, apply glue to the first arm and attach. Working with one arm at a time will make assembly significantly easier. Grasp the figure at the base or legs, and apply the arm with gentle pressure. Drying times will depend on the glue you are using.

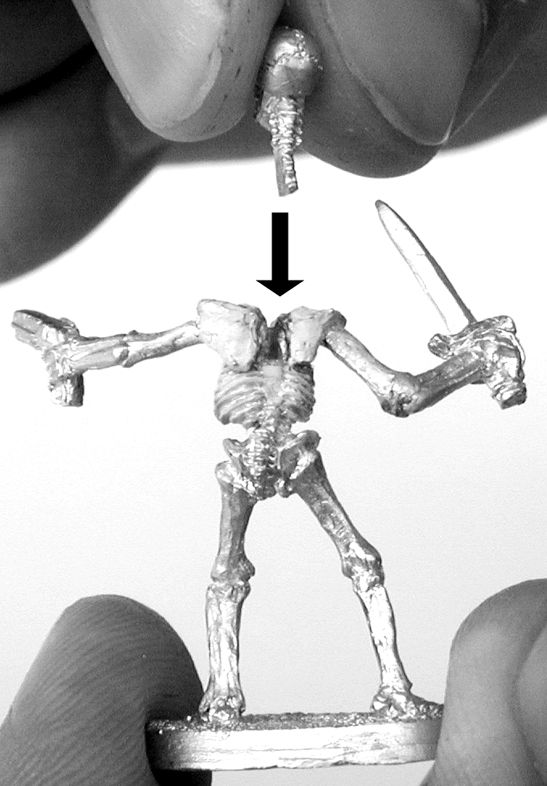
If you have not attached the arms, we recommend you do so before attaching the skull. It makes fitting the skull against the shoulder blades much easier.
At the top of the torso is the neck slot. Be sure to fit the "neck" on the bottom of the skull into the slot before applying any glue. In most cases, some trimming of the neck will be desirable. Shortening the neck should be enough, but if the shoulder blades are too close together, the neck may also need to be thinned. A pair of pliers or a file can easily reshape the metal. Also, if you would like to tilt the skull, now is the time to bend the neck.
Once the glue has dried (overnight is normal, but check the directions to be certain), the skeleton can be primered. We recommend a white spray primer, and Reaper's Pro Paint line for the details. Unsuprisingly, Ivory is a useful color.
Alternatively, a simple blackwash can bring out the details of the figure for a quick crowd scene.