


Assembling the Ogre Mk. VI
General Assembly Tips
You'll need three main tools to assemble most miniatures. First is the fixative. We recommend Thick Super Glue, because it not only holds nicely, it fills those small gaps between pieces. Advanced modelers may wish to use rubber cement or green putty to hold their Ogres together. These materials don't hold permanently, which may be desirable if you plan on disassembling the Ogre during a game (to simulate damage) or for transit.
Second, you'll need a cutting tool. Hobby shops will be happy to sell you cutters in various sizes and angles, but a straight nail trimmer will work for most figures. I wouldn't use it on your nails afterwards, though.
Lastly, a file comes in very handy. Again, many shapes, sizes, and roughnesses are available from specialty shops. If you don't have a hobby shop available, nail files will work.
Identifying the Pieces
Six types of part make up the Ogre Mk. VI: the fore hull, the aft hull, the main guns, the secondary guns, the treads, and the tower.
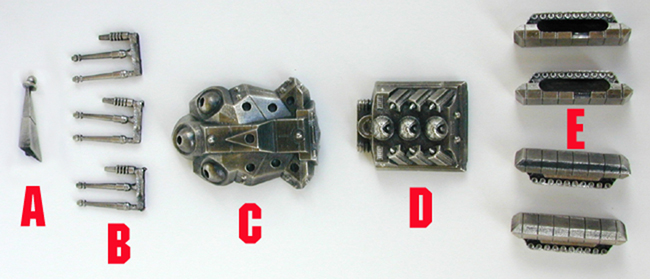
The tower (A) has a triangular cross-section, with a sphere on the narrow end.
The guns sprue (B) has two types of guns; one main gun and two secondary batteries. The main guns are the shorter ones with ribs. The secondary batteries are longer, and don't have ribs. The Ogre Mk. VI requires three gun sprues.
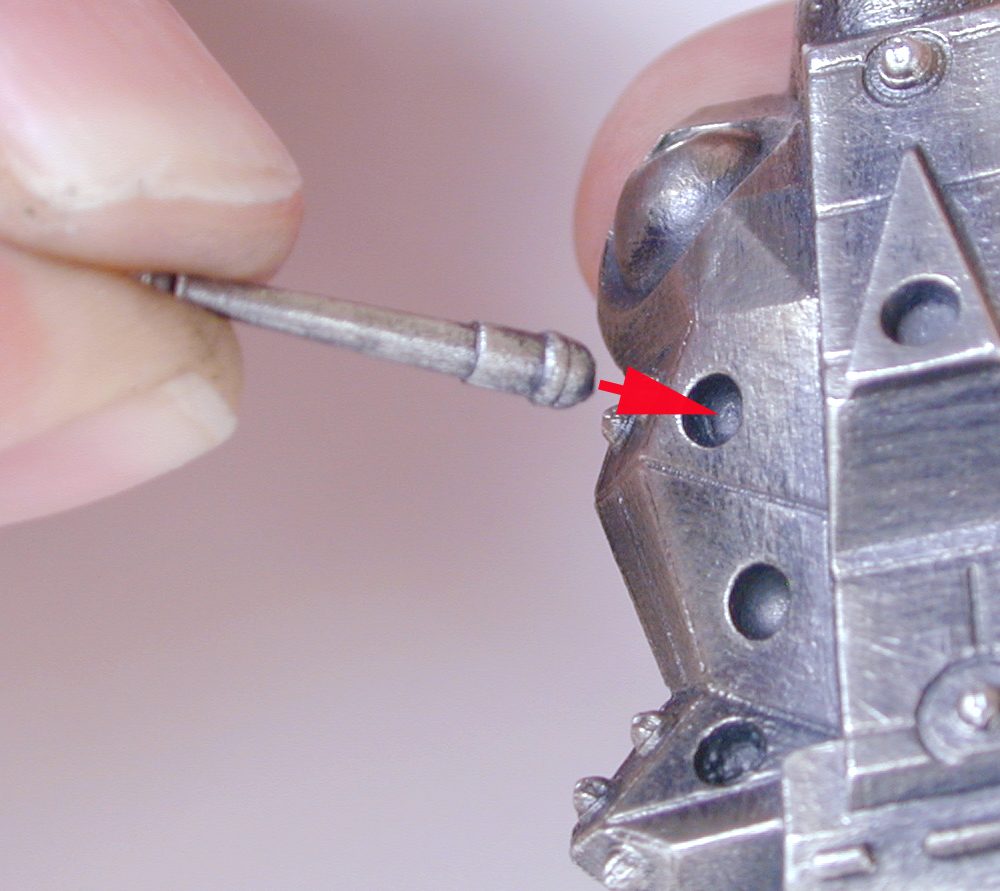
The fore hull (C) is the more massive of the two hulls, with a taller prow in front. Other identifying details are the three sockets for the main guns on the front, the two rows of three sockets for the secondary batteries along the sides, and the triangular surface with a socket on top.
The aft hull (D) has no sockets for weapons. The front has two ribbed protrusions flanking a semi-circle; this is the joint with the fore hull. The rear of the aft hull has two small dome-like features (the AP weapons).
The treads (E) are rectangular, with a hollow side. The bottom of the tread is textured, and the top is flat with panels. Above the hollow is a notch, to align it correctly when attaching the treads to the hull. The Ogre Mk. VI requires four treads.
Assembly
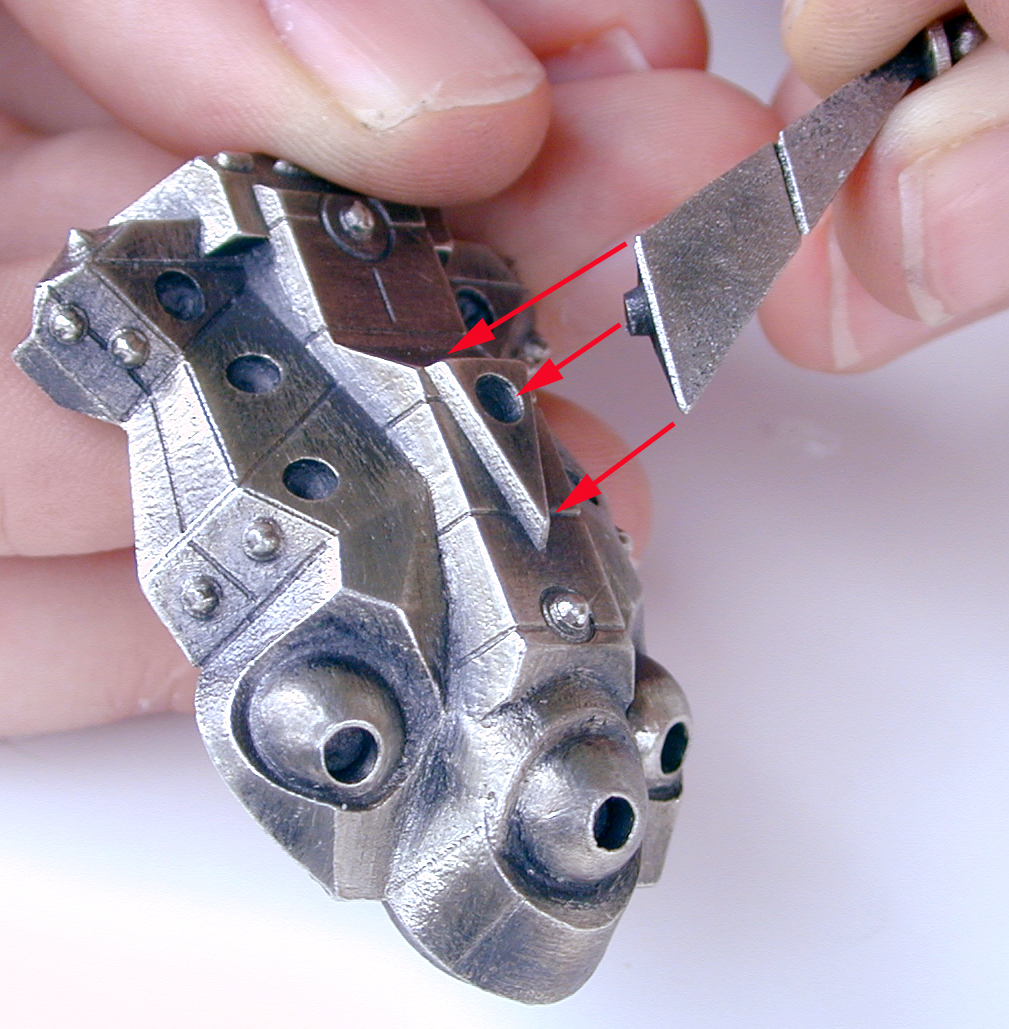
Before painting, we recommend fitting all pieces together and filing any rough areas.
We recommend attaching the treads to the hulls first, then connecting the hulls if desired. Next, the tower should be attached. Attaching the guns should be the final step, as they are more delicate.
Attaching the Treads
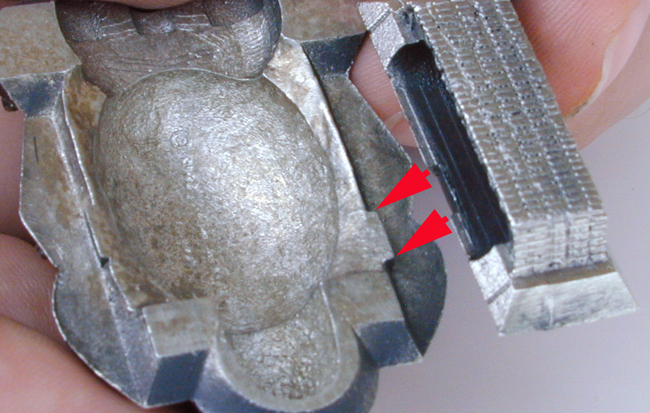
The treads connect to the underside of the hulls, two per hull. One side of each tread is hollowed; this side should be turned to the inside of the Ogre. The outside of the tread has surface details.
The treads of the Mk. VI do not have pins as did the treads of most earlier Ogres. Instead, each tread aligns with the bottom of the hull using a notch on the upper inside edge of the tread. This notch fits into a guide on the hull.
Filing shouldn't be necessary, but even a little flash may interfere with the smooth joining of the surfaces. It is always best to fit the pieces together before gluing.
The best point to glue is the joint between the notch and guide. For extra strength, run a thin line of glue along the inner edge of the hull, where the tread will fit.
Attaching the Aft Hull . . . Or Not
Connecting the two hulls is strictly optional. The advantage of doing so arises primarily during play; moving one piece is easier than two. However, one large hunk of Ogre is often less convenient to transport than two slightly smaller pieces.
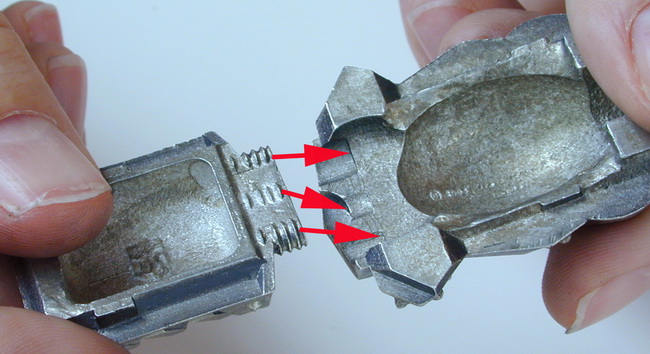
If you choose to join the fore and aft hull, the best time to do so is after the treads have been attached, but before adding any guns or the tower.
The two hulls join together with a fairly wide area, making gluing an attractive choice.
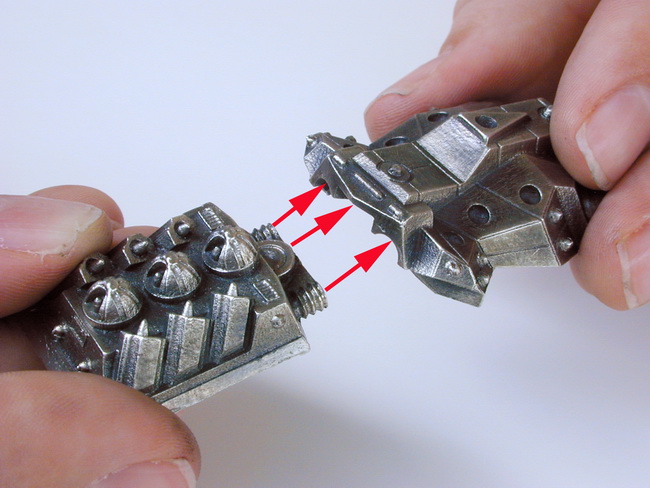
However, unless you handle the Ogre very carefully, or use a very powerful glue, the weight of the two hulls can break the joint. To reinforce the connection, use a paper clip (or other heavy gauge wire), cut into two ¾" lengths. Place the wire on either side of the normal joint, and glue the hulls and the wire together. Alternatively, a strong putty could be used.
If you're feeling "expert-ish," a large pin vise could drill out the three cylinders protruding from the front of the aft hull. Three lengths of wire could then be used to reinforce the joint.
Attaching the Tower
The tower fits into the socket on the top of the fore hull. This socket is centered on a triangular flat panel.
To insure proper alignment of the tower, look at the hull from the top down. When the tower is centered, a thin line of the base should be visible beside both leading edges of the tower. Make sure the lines are of equal width, and you're centered.
It is somewhat important to fix the tower into place before the secondary batteries. Since the secondaries stick up on the outer edges of the hull, and the tower occupies the center, it is very easy to dislodge a secondary during the tower fitting.

Attaching the Guns
The first step to attaching the guns is to remove them from their sprue. A good rule of thumb for novices is to find the point where the gun begins and the sprue ends, then cut a few millimeters back into the sprue. Extra sprue material can easily be trimmed off or filed away. It isn't so easy to replace a chunk of a secondary that you've mistakenly cut off.
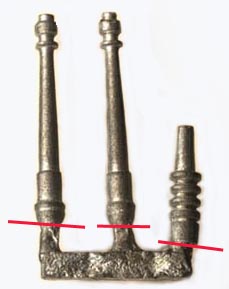
The main guns are, for the most part, flat on the bottom. This makes the removal of any extra sprue material easy – just file the area smooth.
The secondary batteries are more curved at the base, but as that section will be placed into the socket, a bit of extra sprue or an accidentally over-filed area is easy to hide.
Once the pieces are off the sprue, fit them into the sockets gently. If they don't fit, file any area that binds. Don't apply too much pressure to the piece; it should fit easily. Test, file, and repeat until you've got a snug fit. Don't worry about any gaps that may show, as most glues will fill them nicely.
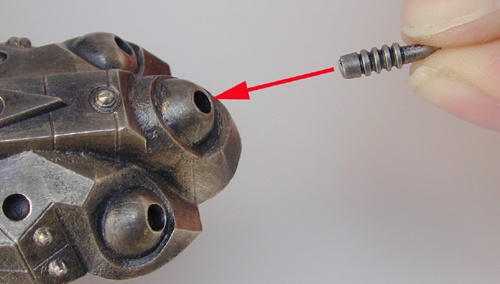
Secondaries are fairly easy. Simply remove from the sprue and fit into the socket. The sockets are quite wide in relation to the barrels, to allow a range of positions. It also allows the bases of the guns to be rougher.
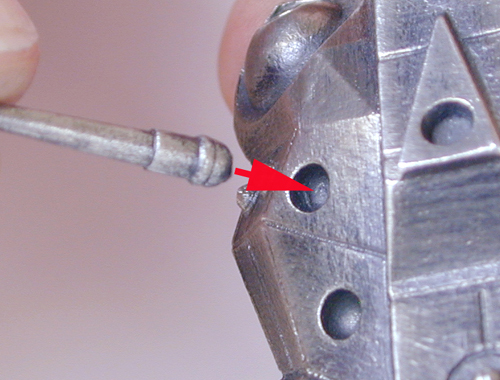
Main guns can occasionally be tricky, as the socket fit is much more snug. If you have a round file, you can widen the socket, but normally, the best bet is to work the base of the gun evenly. Avoid filing a flat spot onto the round base. If this happens, turn that side down in the socket.
Painting
When painting the Ogre Mk VI, an excellent aspect to emphasize is its size. This is the BIG Ogre . . . have fun with that.
No matter what colors you use, running a thin brush with a dark shade down the detail lines between the panels help everything stand out.
A good painting design makes the most of contrasting colors. A light tinted color for the flat surfaces will help the details catch the eye. For example, red and white details on dusty tan, blue and red on white, or yellow and black on green all work well.
The Ogre Mk. VI likes the number three. It has three main guns, two rows of three secondaries and external missiles, and three missile racks. You can use the same color on these groupings of three to provide the viewer's eye with continuity.
If your painting style includes the use of decals, either home-brew or art swiped from other kits, there are several good spots to place them on the Mk VI. The most obvious is the sides of the tower. The fore hull has many flat panels which will take decals, including behind the tower and on the front prow between the center main gun turret and the other turrets. The aft hull has many surface details, but a small decal would fit on the "bumper" at the rear. Both the missile racks on the aft hull and the outside edge of the treads have a lot of fine detail and are candidates for a good drybrushing.
