


Painting Infantry: Boot Camp
by Stephan Beal
November 15, 2018
Prologue
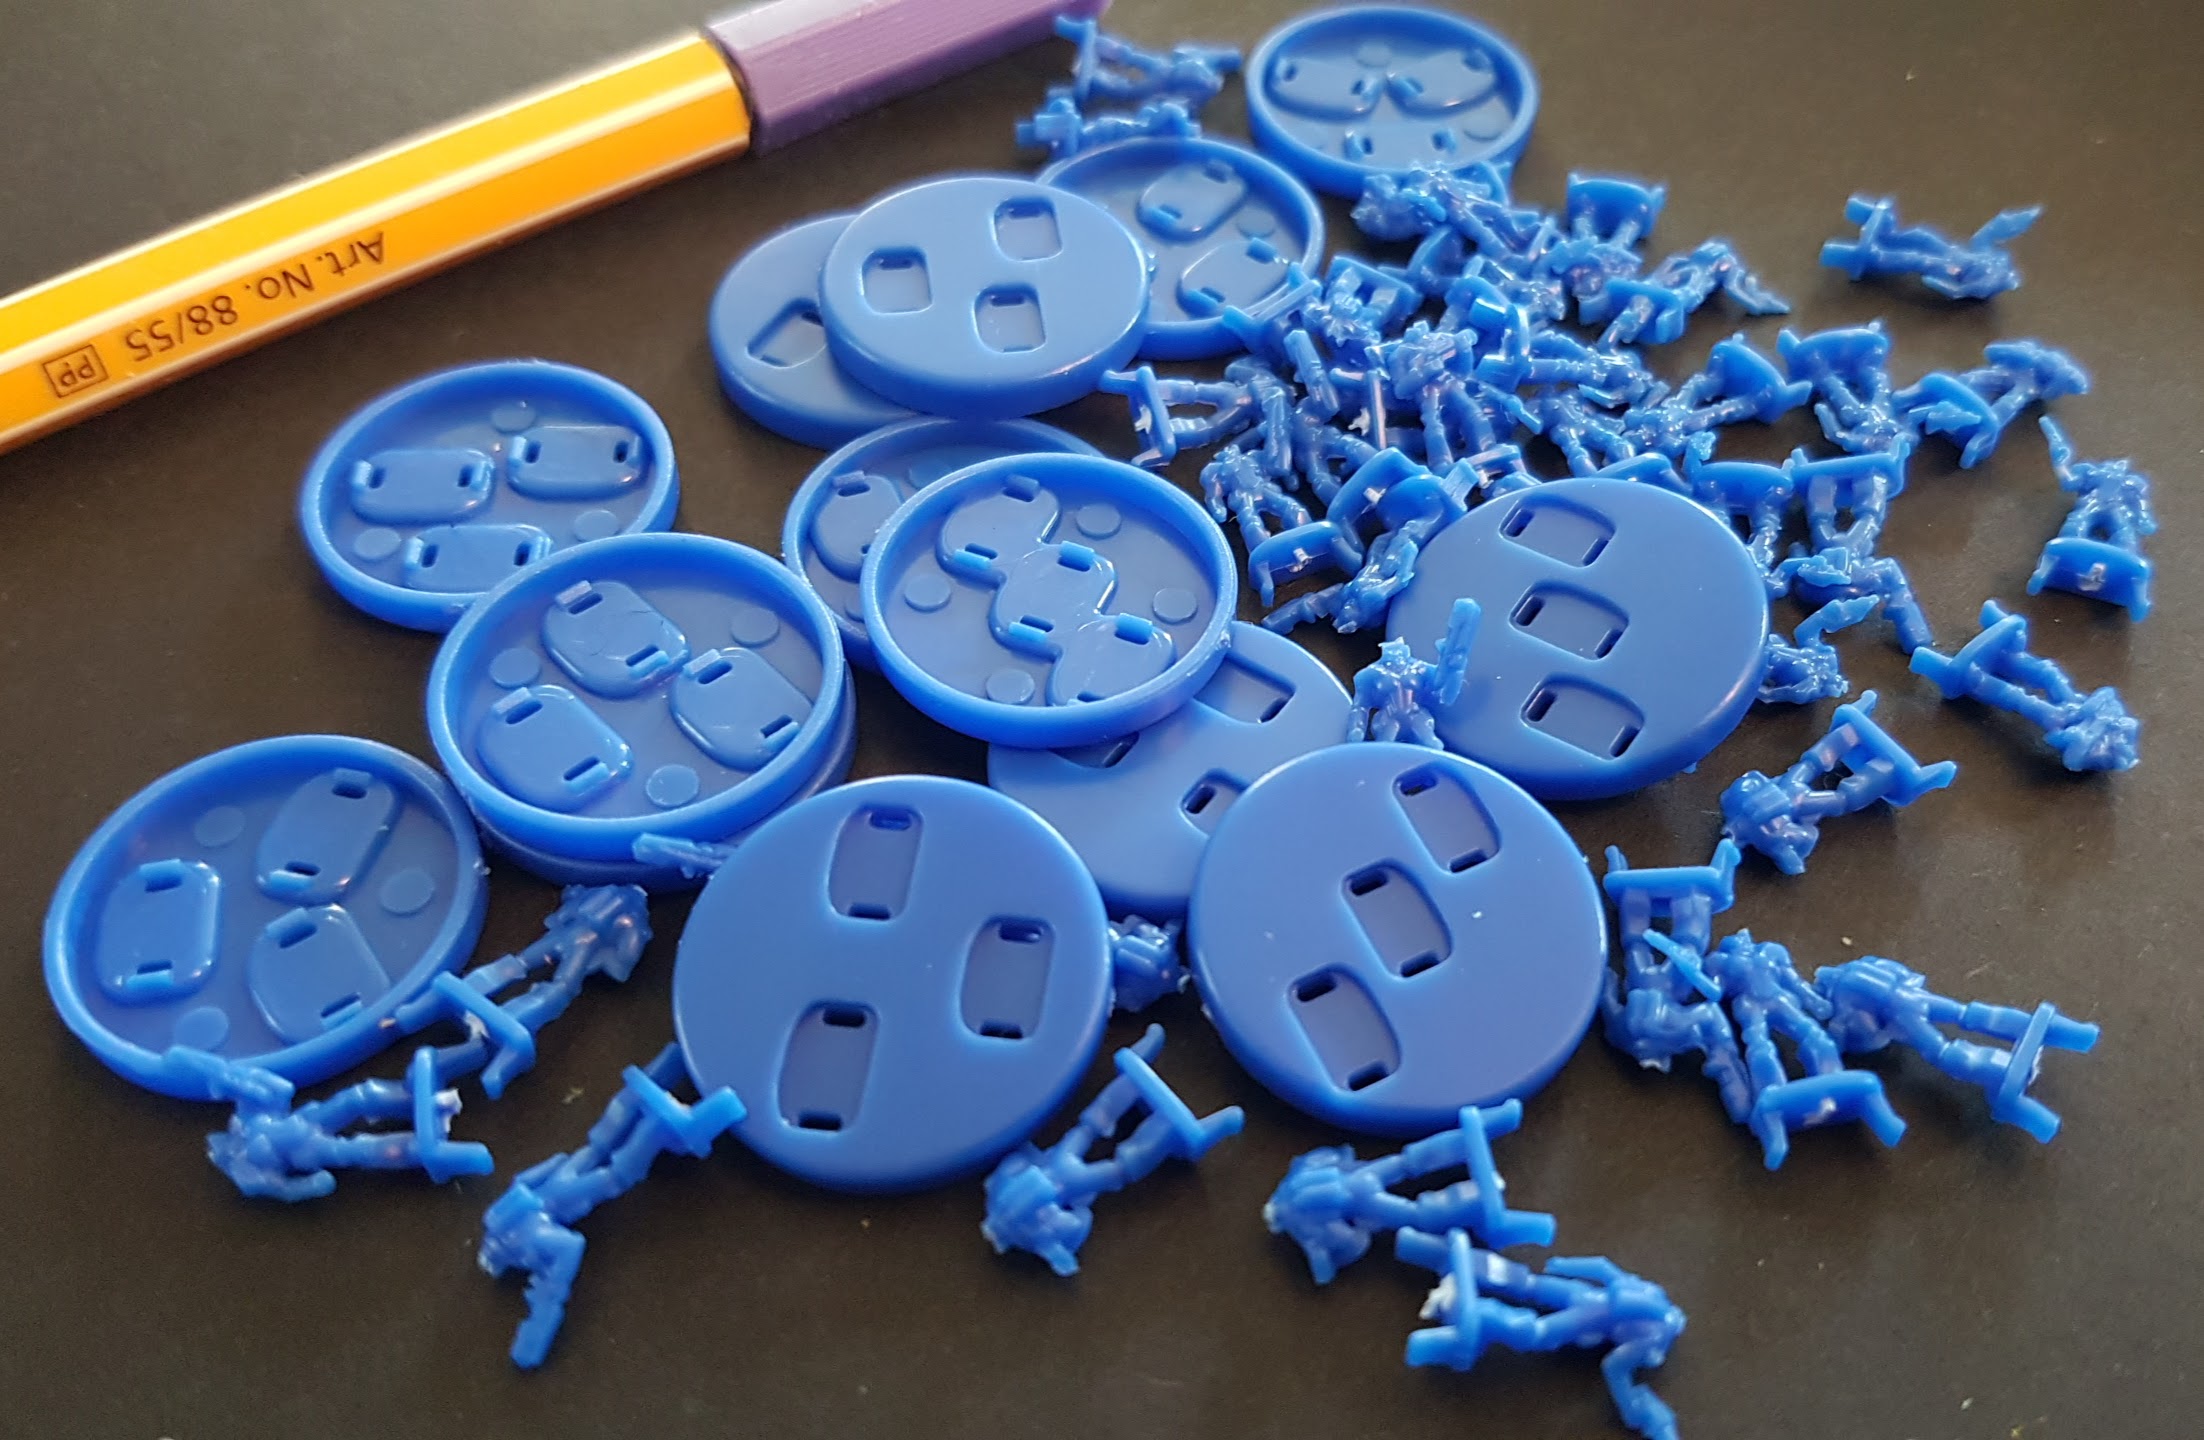
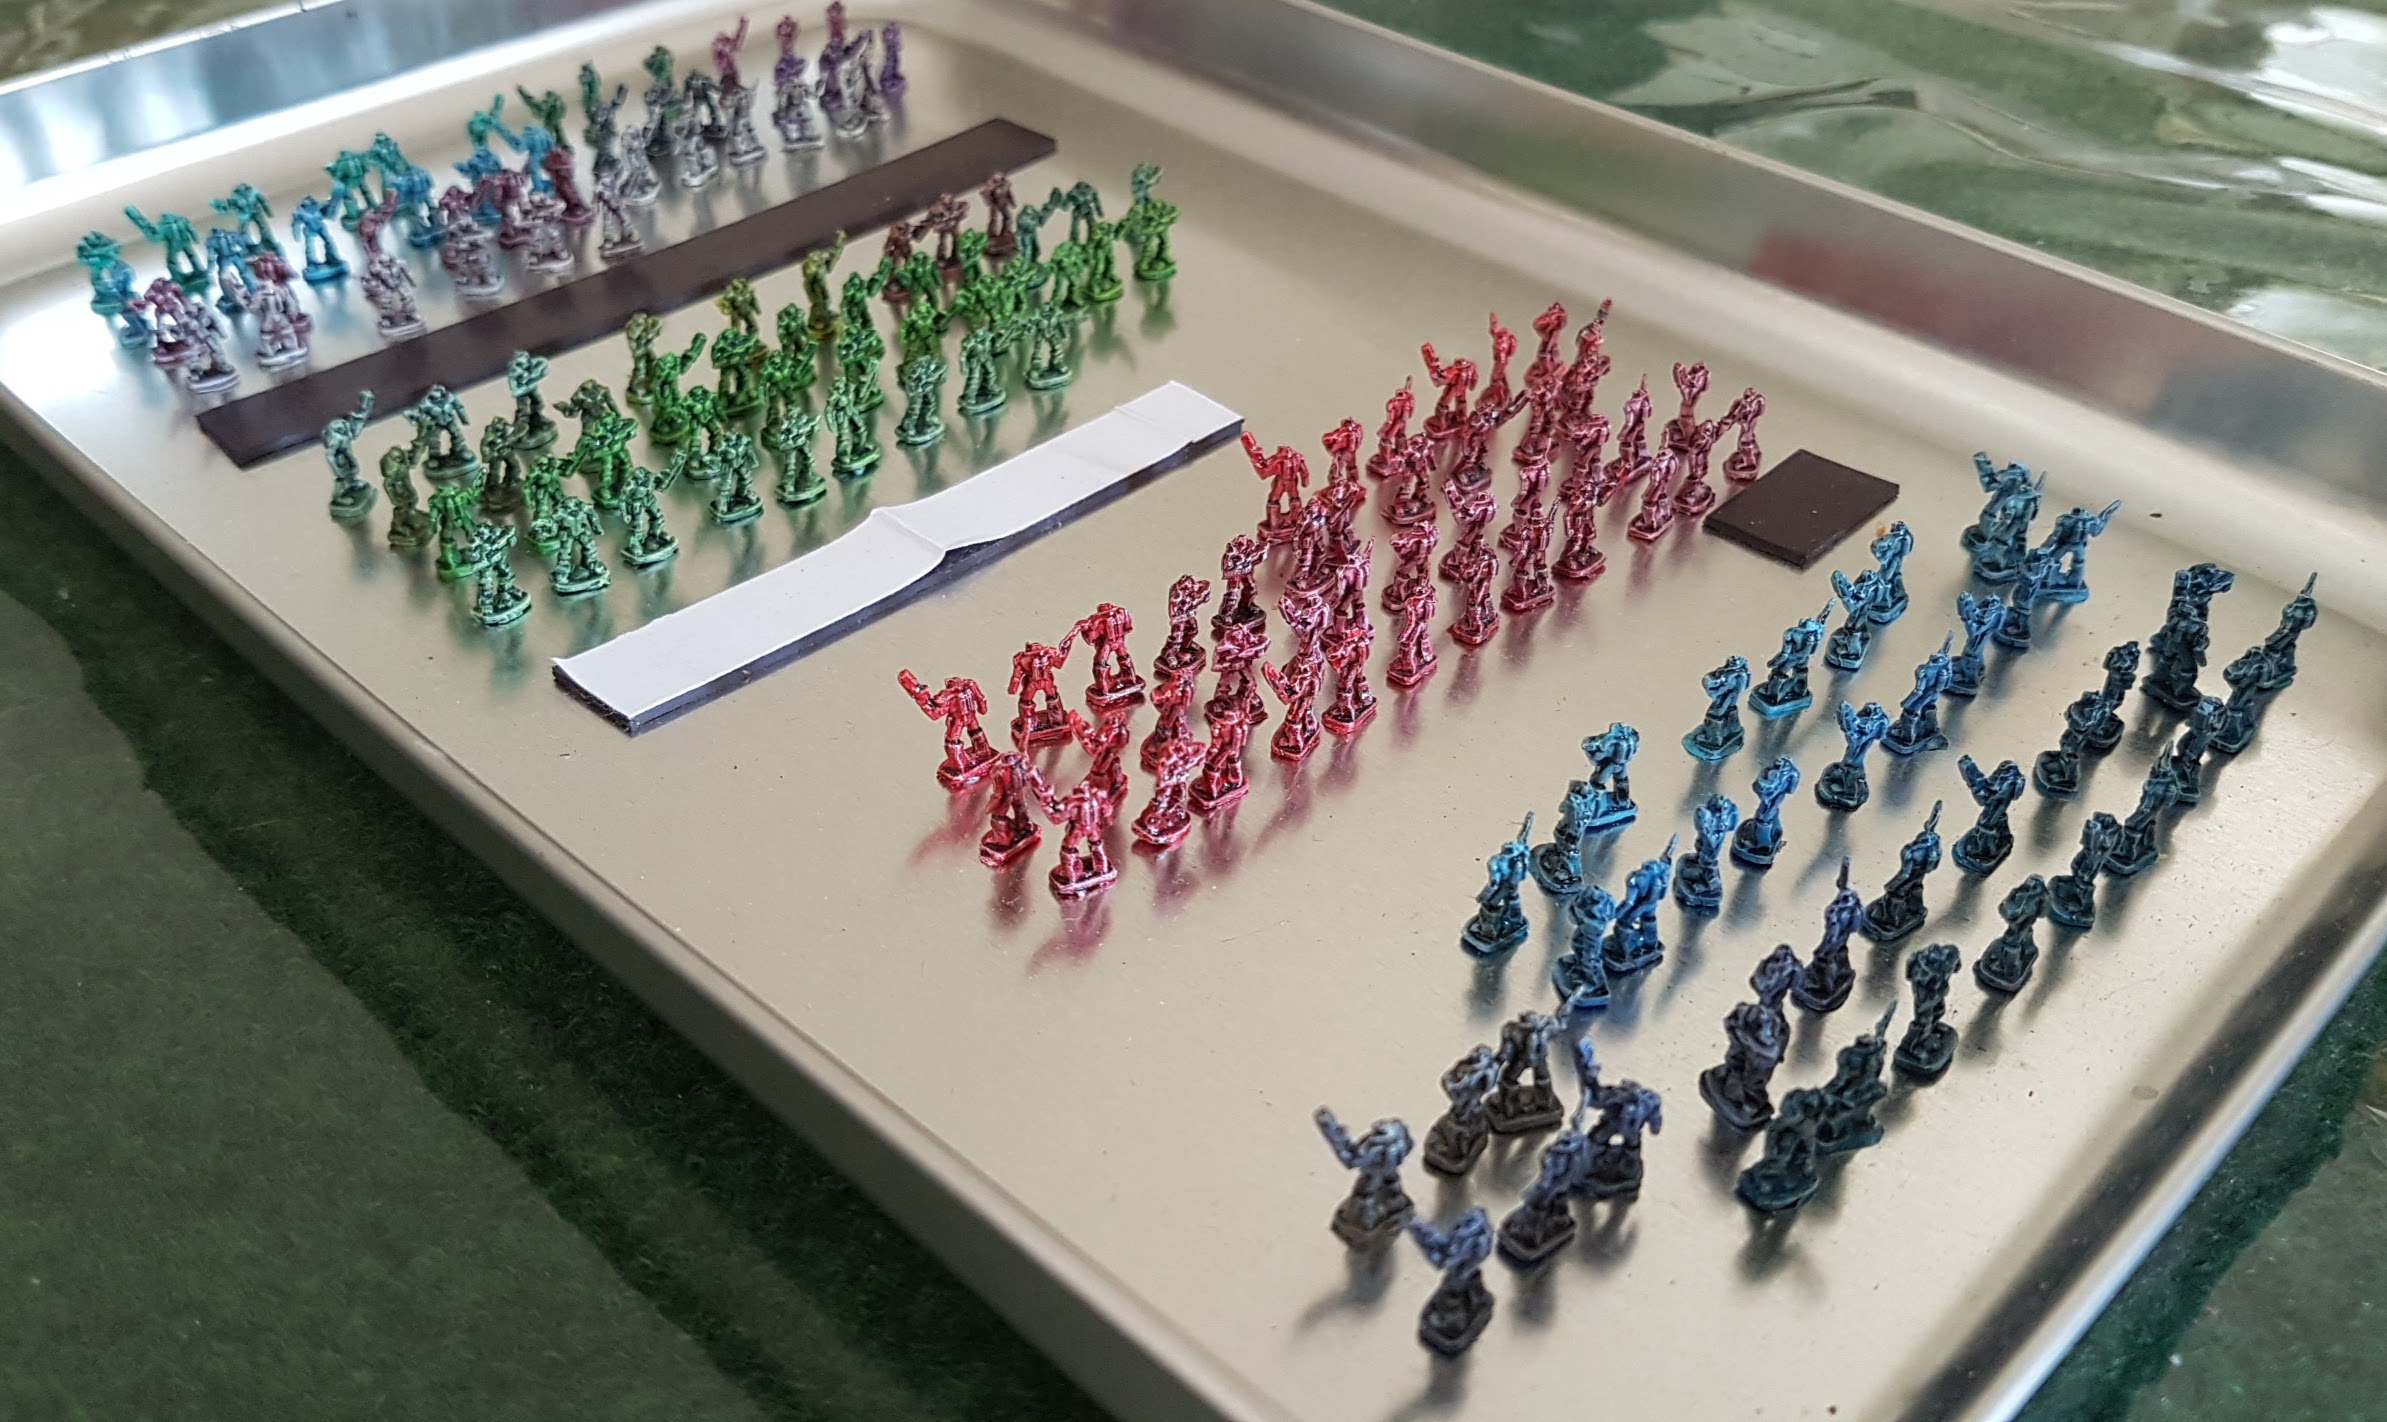
Each army of Ogre Miniatures includes 42 miniscule infantry figures. While it is tempting to use them as-is, without painting them, they look quite bland. This article demonstrates that with just a little effort, even a complete non-painter can turn these tiny plastic soldiers into… well, not quite works of art, but something more exciting than nondescript red or blue specks on the tabletop.
Forewarnings: This article was written by a non-painter/non-modeler for non-painters/non-modelers. Experienced painters and/or modelers may have opinions which differ, perhaps wildly, from any suggestions made here. Due to space considerations, we neither go into detail regarding common painting terminology (e.g., dry-brushing, washing, and “the scale effect”), nor discuss how to set up a painting station or mount minis to make them easier to manipulate while painting. Online tutorials and video services cover such topics in great detail should you need more information about them. Additionally, painting is very much a “by-feel” activity. Any suggestions made here may or may not match your own sense of feel and aesthetic tastes – adjust them to suit.
Required Materials:
- Acrylic paints and brushes. Each mini requires three colors: white (base and highlights), black (wash), and a single body color of the painter’s choice. My own set is a generic bundle of 20-odd colors – costly name-brand paints are not needed.
- A dark wash. The recipe for a suitable homemade wash is detailed in the article (requiring acrylic medium, distilled water, and acrylic ink).
- A sealant of some sort (e.g., spray varnish or plain white glue).
- Optional: “Flow aid” can assist in the coverage of the paint and can be bought or created in various ways. A mix of six-parts distilled water to one-part glycerin makes a decent, inexpensive general-purpose flow aid. Some people simply use a tiny amount of dish soap.
Step One: Priming
To help ensure that our infantry units are suitably vibrant, we want a bright base color. Plain white works great, though some might prefer a light grey. At the scale of these particular minis, brighter is better. We need to apply a thin, but complete, coat of this to our infantry. Spray cans or an airbrush are arguably the easiest ways to apply this coat, so use them if you’ve got them. Failing that, coating them by hand is not difficult but might take more time. My own minis use a mix of airbrushed and hand-painted coats, and the end results, at this scale, look the same either way. A priming-specific paint is not needed – any plain acrylic paint is fine for this purpose. After priming, let them dry completely before proceeding.

Priming is not strictly necessary for these minis. We can, if we’re being lazy (who, me?), apply the “final” color directly to them. Having a bright priming layer really helps their final color to stand out, however, and is strongly recommended for best results. Though gesso paint often makes a good priming material, it is definitely not recommended for minis at this scale because the gesso’s texture plays havoc with their tiny details.
Step Two: Give It Some Color
With the priming layer in place, we can now apply the main color (i.e., the only color, with the exception of the wash and highlights!). With my box of generic paints, ultramarine blue and carmine red are perfect matches for the colors of the unpainted Paneuropean and Combine miniatures, respectively. There’s no specific reason why the infantry of one faction all have to have identical colors, so feel free to mix them up. Assuming one wants a conventional blue-vs.-red color scheme, dark turquoise comes out looking quite nice for the Paneuropean units, as does sky blue. For more variety, various greens or even bright violet look fine. Ultramarine blue works well but comes out quite dark. It might be tempting to use a metallic paint, but my own experimentation with metallics gave rather “meh” results.

As with priming, the base coat can be sprayed or brushed on. When brushing it on, a bit of flow aid or thinner may make the paint easier to apply. A single coat suffices for these minis, and it’s okay if the color from the priming layer shows through a bit, as the wash and/or highlights will cover it up.
After applying this layer, allow it to dry completely before continuing. Note that use of a flow aid may increase the drying time.
Steps Three and Four: Washing and Dry-brushing
The steps of applying wash and dry-brushing (highlighting) are combined here because their order is largely a matter of taste. The results are subtly different depending on whether wash is applied before and/or after dry-brushing. Regardless of which order the wash and dry-brushing are applied, allow each to dry completely before applying the next. Dry-brushing over not-quite-dry wash just makes a mess of things! For the sake of demonstration, we assume that the wash is applied first.

Finding a good wash can be difficult, and thus we provide a specific wash formula, which works very well with these minis (indeed, with nearly everything): ten-parts (50%) distilled water, nine-parts (45%) acrylic medium, and one-part (5%) flow aid. That results in a colorless wash base to which arbitrary color can be added. One drop of acrylic ink per milliliter of base liquid is a recommended option, but the exact ratio is largely a matter of taste and may also depend on the brand and density of ink. Using three drops per four milliliters also provides good results on these minis. Acrylic paint can be used in place of ink, but it can separate from the wash base over time and may need to be stirred/shaken frequently.
To apply the wash, simply brush it liberally over the mini and dab away any large pools (which tend to appear between the legs, around the feet, and where the arms meet the torso).
Dry-brushing goes quickly with these minis: 30 seconds to 1 minute per model is typical. Which color to use for dry-brushing is largely a matter of taste: plain white vs. a lighter tone of the base coat color. Given the scale of these minis, a plain white works quite well. Adding a tiny, almost invisible, amount of yellow may liven up the highlights a bit, but the effect might not be visible at this scale. If, after dry-brushing, the highlights are too exaggerated, it’s easy to dial them back by dry-brushing, ever so lightly, over them with the model’s base coat color. That provides a subtly different effect than dry-brushing using a lighter tone of the base coat color. (At the scale of the infantry, the difference may be too subtle to notice, but is more visible on the larger models.) Alternatively, applying wash after the dry-brushing has completely dried may suitably tone down unduly strong highlights.
Step Five: Sealing
To keep the paint job from scratching off, we need to seal the paint. It’s important that we wait until all of the layers are completely dry before continuing. Trying to seal a model before the dry-brushing or wash dry fully can completely ruin a paint job by causing the various colors to mix.
Spray sealants are the simplest solution. Feedback from long-time modelers suggests that glossy sealants are harder and more scratch-resistant than matte sealants, and they recommend first applying a couple coats of gloss before reducing (if desired) the gloss effect with a coat of matte sealant, allowing each coat to dry before applying the next. That said…
Sprays are costly and not the only viable solution. Plain white glue (a.k.a., PVA) makes for a perfectly decent sealant, especially if the minis are not going be unduly mishandled. PVA-like substances, such as Mod Podge, can also be used for this purpose, but may be glossier than PVA. Mixing the glue with a small amount of water or flow aid simplifies application considerably, but make sure it’s thick enough to provide protection once it’s dried. One or two drops is normally enough to coat three squads of infantry, and two coats are recommended (three if you like, but too many coats may blur out the model’s details). PVA is easily applied with a pointy brush, but be careful to avoid pooling of large globs. While working, clean the brush off periodically (after every 6 to 9 infantry or so) to keep the glue on the brush from partially drying, which causes annoying sticky strands to build up on the brush. When finished, thoroughly clean the brush to get the glue out (rubbing alcohol helps by destroying the adhesive).
The brush-on PVA approach is orders of magnitude less costly than spray sealants, but also requires considerably more time to apply. Roughly 45-60 seconds per infantry model per coat of sealant is a good rule of thumb.
There’s one notable achtung when sealing with PVA: if the minis will be stored clumped together, let the sealant set for a week or more before storing them. If the sealant is not 100 dried, PVA-coated minis pressed together for long periods may stick to each other! (Been there, done that!) Once the glue completely dries, that is no longer a problem. When in doubt, let the minis set out in the open for at least a week or two before dumping them together in a storage box.
Once the sealant is dry to the touch, you can unleash your models upon your opponents!
Just in Case: Starting Over
If something goes horribly wrong while painting, or the chosen color scheme simply doesn’t suit you, it’s easy to strip the paint and start over. Rubbing alcohol and a toothbrush can remove PVA sealant and acrylic paint from minis, especially if they haven’t set for longer than a day or two. Drop the offending models into rubbing alcohol, let them sit for a bit, then strip them one by one with a toothbrush. Be sure to wear safety goggles and use gloves, as you certainly do not want rubbing alcohol droplets in your eyes, and prolonged contact with skin is highly irritating. If you have a breathing mask, use it to avoid inhaling the tiny droplets which the toothbrush can send flying everywhere. Those droplets may stain clothes, so dress appropriately!

It’s Not Just for Infantry…
The approach described in this article can be just as easily applied to the armor unit minis, including Ogres, and allows non-painters to produce some surprisingly decent paint jobs. For red Combine armor units, a white priming layer is not strictly needed – they come out just fine without one, provided they’re coated with red. For the darker Paneuropean units, as well as the Combine infantry, a white priming coat layer is recommended to help brighten up the models a bit.
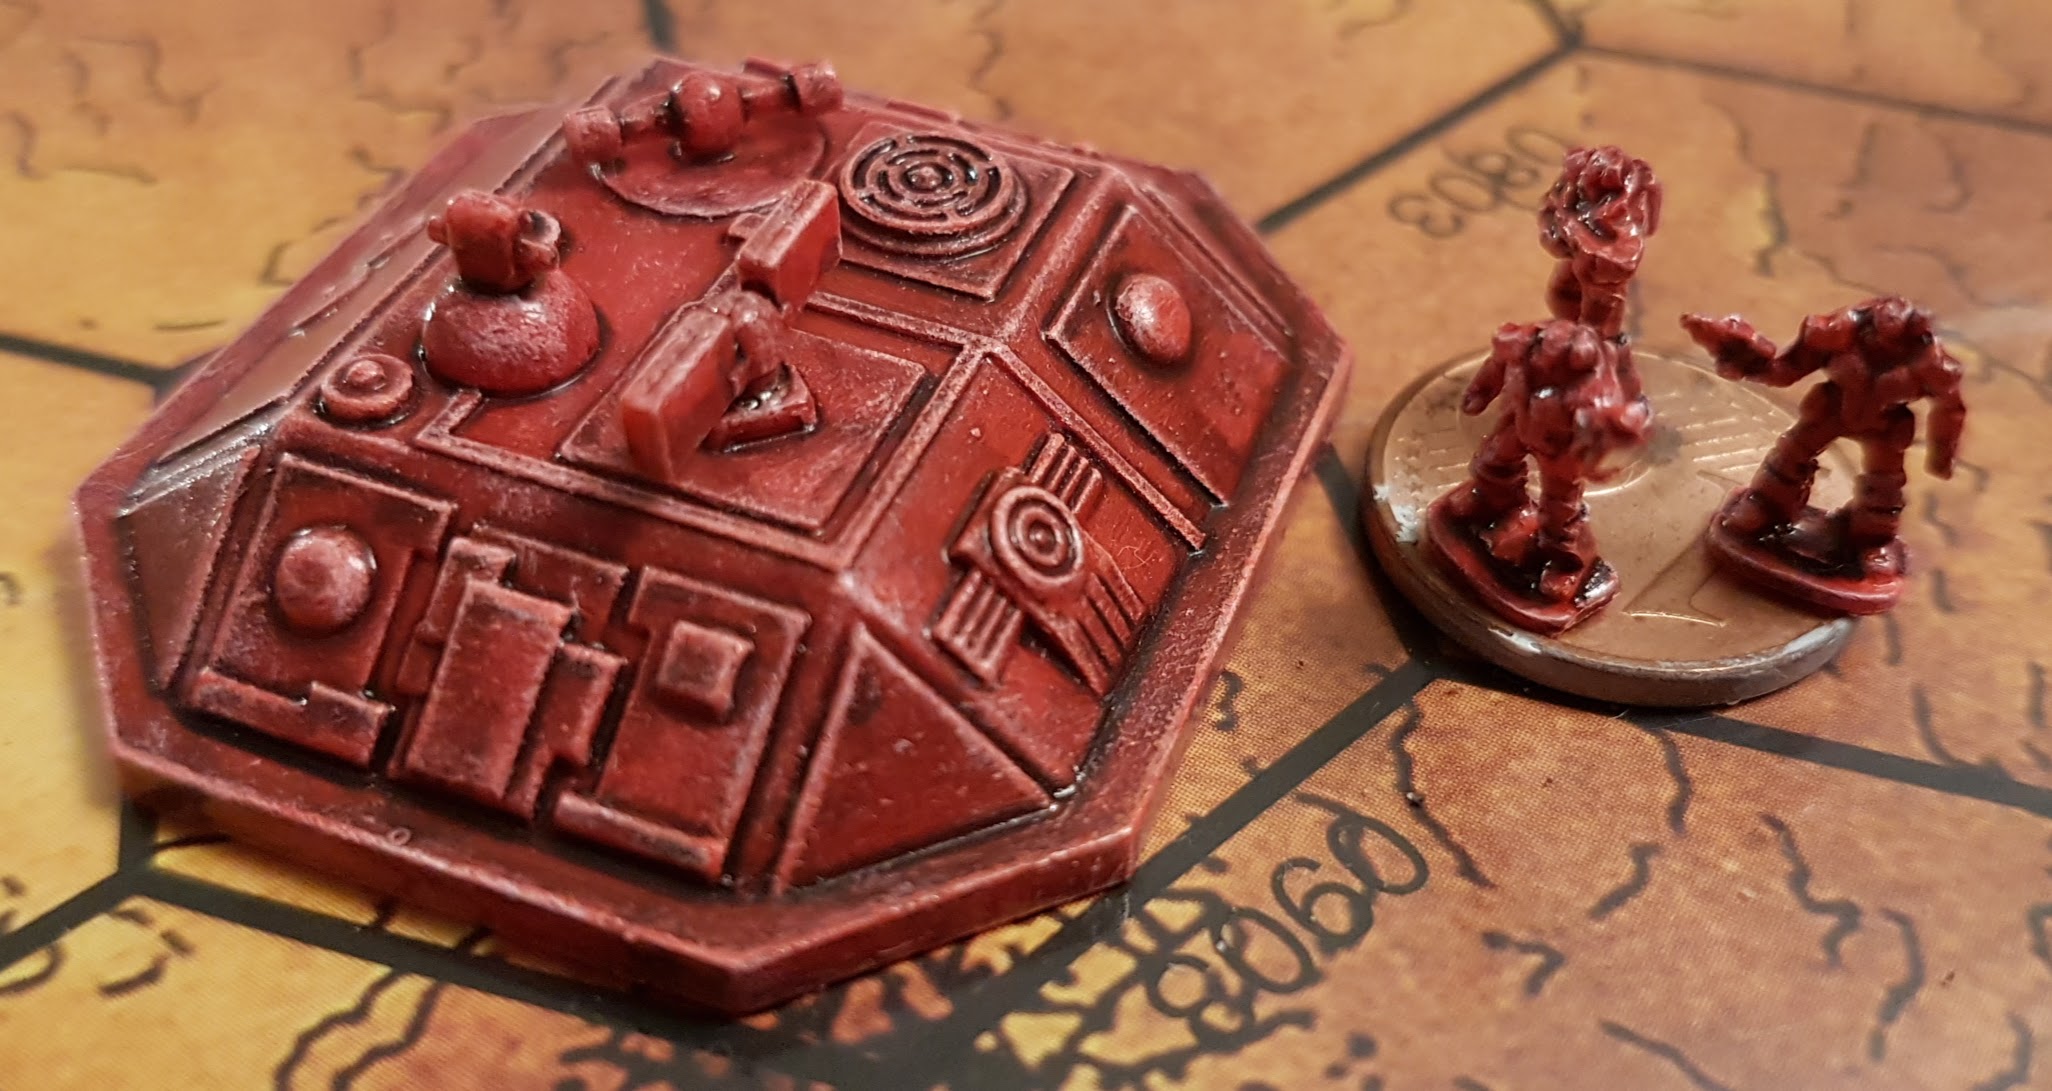
Here’s one recommended tweak to the process for armor units: when dry-brushing with white, overdo it! Exaggerate the highlights to the point where you think, “wow, that’s ugly!” After that dries, dry-brush it again, this time more lightly, with the base coat color, covering up the white. That provides, to my eyes, subtler, more natural-looking highlights than simply dry-brushing with white or a lighter tone of the base color. The process can be repeated to refine the highlights.
The Ogrezine II PDF, combining all of these articles with additional new material, will be available on Warehouse 23.